


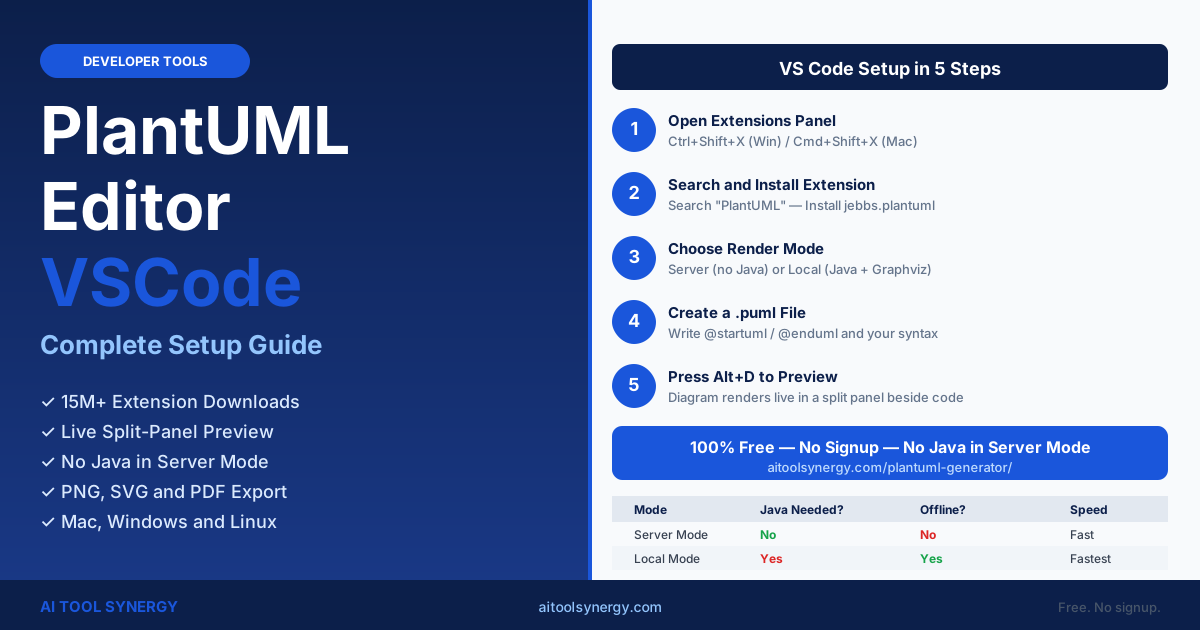
PlantUML Editor VSCode: Complete Setup Guide (Free)
Setting up the plantuml editor vscode extension is the fastest way to bring diagram-as-code into your daily workflow. Instead of switching to a browser tab, you write PlantUML syntax in a .puml file and see a live diagram preview beside your code — no extra context-switching needed.
The plantuml editor vscode extension — published as jebbs.plantuml on the VS Code Marketplace — has been downloaded over 15 million times. It supports every major UML diagram type with live preview, PNG and SVG export, and keeps your diagrams version-controlled alongside your codebase.
This guide covers every step — from install and Graphviz config to server mode, export, IntelliJ setup, Mac steps, and offline options. By the end you will have your first diagram generating in under ten minutes.
What Is the PlantUML Editor VSCode Extension?
The plantuml editor vscode extension — officially named jebbs.plantuml on the VS Code Marketplace — transforms Visual Studio Code into a full diagram-as-code environment. You write PlantUML syntax in a .puml file, press Alt+D, and a live diagram renders in a split panel beside your code.
It was created by developer jebbs and has accumulated over 15 million installs, making it by far the most popular PlantUML integration for any IDE. Unlike a browser-based tool, the extension keeps your diagrams local and tracked in Git alongside your source code.
For quick testing or when you prefer zero setup, our free PlantUML generator delivers the same live-preview experience directly in your browser without any installation.
.puml files, and works offline once configured with local rendering. Browser tools are faster to start but lack repository integration.How to Install the PlantUML Editor VSCode Extension
Installation takes under two minutes. The extension is available on the Visual Studio Code Marketplace and installs directly from inside the editor — no file downloads or restarts required.
- 1Open the Extensions Panel
Press
Ctrl+Shift+Xon Windows and Linux, orCmd+Shift+Xon Mac. The Extensions sidebar opens on the left of your editor window. - 2Search for PlantUML
Type PlantUML in the search box. The top result should be “PlantUML” by jebbs (identifier: jebbs.plantuml). Check the publisher name to confirm you have the correct extension.
- 3Click Install
Click the blue Install button. VS Code downloads and activates the extension automatically. No restart is required in most cases.
- 4Create a Test File
Create a new file and save it with the
.pumlextension. Type@startuml, press Enter, typeAlice -> Bob : Hello, press Enter, then type@endumlto write your first diagram. - 5Press Alt+D to Preview
With your
.pumlfile open, pressAlt+D(Windows/Linux) orOption+D(Mac). A diagram preview panel opens beside your code and updates as you type.
Ctrl+P (or Cmd+P on Mac), type ext install jebbs.plantuml and press Enter. This installs the extension without opening the Extensions sidebar.Configuring the PlantUML Editor VSCode Extension with Graphviz
After installing the plantuml editor vscode extension, the first decision is your render mode: server mode (easiest, no Java required) or local mode (faster, works offline, requires Java and Graphviz). Most beginners should start with server mode.
To configure server mode, open VS Code Settings (Ctrl+,), search for plantuml, and set the Render option to PlantUMLServer. Then set the Server field to the official endpoint. Your diagrams will render through the PlantUML official server with no local dependencies.
| Setting | Value for Server Mode | Value for Local Mode |
|---|---|---|
plantuml.render | PlantUMLServer | Local |
plantuml.server | https://www.plantuml.com/plantuml | (leave blank) |
plantuml.exportFormat | png | png |
plantuml.exportOutDir | out | out |
plantuml.java | (not needed) | Path to java.exe or java |
For local mode, you must install Graphviz separately and add it to your system PATH. Download the appropriate installer for your OS from the official Graphviz site, install it, and then confirm it is available by running dot -version in your terminal.
PlantUML Editor VSCode: Server Mode vs Local Rendering
Choosing the right rendering mode for your plantuml editor vscode setup depends on your network access and performance needs. Server mode requires an internet connection on every render. Local mode runs entirely on your machine once configured, with faster response times for large diagrams.
- No Java or Graphviz installation needed
- Works immediately after extension install
- Uses official PlantUML public server
- Requires internet connection on every render
- Diagram code sent to external server
- Ideal for: beginners, corporate laptops with Java restrictions
- Requires Java JDK and Graphviz installed
- Works 100% offline once set up
- Faster rendering for large diagrams
- No external data transfer — fully private
- Supports batch export and PDF output
- Ideal for: developers needing offline use or data privacy
How to Preview Your Diagrams in PlantUML Editor VSCode
Previewing diagrams in VS Code is designed to require minimal steps. Once your .puml file is open and the extension is configured, you have three ways to trigger the preview panel without leaving the editor.
- 1Keyboard Shortcut (Fastest)
Press
Alt+Don Windows and Linux, orOption+Don Mac. A preview panel opens beside your code editor instantly. This is the recommended shortcut for daily use. - 2Right-Click Context Menu
Right-click anywhere in your open
.pumlfile and select Preview Current Diagram from the context menu. The preview panel opens in a split view. - 3Enable Auto-Refresh
In VS Code Settings, search for plantuml.autoUpdatePreview and enable it. The preview updates automatically as you type — no shortcut needed. Useful for active editing sessions but uses more render calls.
If the preview shows a red error image, check that your @startuml and @enduml tags are present and your PlantUML syntax is correct. You can also test your code instantly in our free PlantUML diagram generator to isolate syntax issues.
Exporting PNG, SVG and PDF from the PlantUML Editor VSCode
The extension supports exporting diagrams to PNG, SVG, PDF, and plain text ASCII art. Exports are triggered through the command palette and saved to an out folder relative to your diagram file by default.
- 1Open the Command Palette
Press
Ctrl+Shift+P(Windows/Linux) orCmd+Shift+P(Mac) to open the VS Code command palette while your.pumlfile is the active tab. - 2Run the Export Command
Type PlantUML: Export Current Diagram and press Enter. A format picker appears. Select png, svg, or pdf depending on where you plan to use the diagram.
- 3Find Your Exported File
The exported diagram is saved to the
outsubfolder in the same directory as your.pumlfile. You can change the output location by settingplantuml.exportOutDirin VS Code Settings.
.puml file in your project at once. This is ideal for documentation pipelines and CI/CD workflows that auto-generate diagram images on commit.PlantUML Editor VSCode Tips: Shortcuts, Snippets and .puml Files
Getting the most from the extension means learning the time-saving features beyond basic preview and export. It includes built-in snippets, autocomplete, and keyboard bindings that significantly speed up diagram creation.
| Feature | How to Use | Notes |
|---|---|---|
| Preview diagram | Alt+D (Win/Linux) / Option+D (Mac) | Works only in .puml files |
| Export current | Ctrl+Shift+P → Export Current Diagram | Choose PNG, SVG or PDF |
| Autocomplete | Ctrl+Space inside a .puml file | Lists keywords and snippets |
| Batch export | Ctrl+Shift+P → Export Workspace Diagrams | Exports all .puml files at once |
| Increase size limit | Set commandArgs: "-DPLANTUML_LIMIT_SIZE=8192" | Needed for very large diagrams |
Supported file extensions for the extension are .puml, .pu, .wsd, .iuml, and .plantuml. All of these trigger the live preview when opened. Most teams standardise on .puml for consistency across IDEs and documentation pipelines.
Setting Up PlantUML Editor in IntelliJ and JetBrains IDEs
If your team uses IntelliJ IDEA, Rider, PyCharm, or another JetBrains IDE, the PlantUML integration plugin delivers a similar experience to the plantuml editor vscode setup. It installs from the JetBrains Plugin Marketplace with no extra configuration required on most systems.
To install: open your JetBrains IDE, go to Settings → Plugins → Marketplace, search for PlantUML integration, and click Install. Press Alt+D in any open .puml file to preview. The plugin uses a bundled Graphviz binary on Windows, so local rendering works without a separate Graphviz install on that platform.
The key difference is the absence of server-mode configuration in the JetBrains version — it renders locally by default. If you work across both IDEs, the .puml file format is identical, so diagrams are fully portable between editors.
PlantUML Editor VSCode on Mac: Homebrew and Java Setup
Setting up local render mode on Mac requires Java and Graphviz, both easiest to install via Homebrew. These steps apply to Intel and Apple Silicon Macs running macOS Monterey or later.
- 1Install Homebrew (If Not Already Installed)
Open Terminal and run:
/bin/bash -c "$(curl -fsSL https://raw.githubusercontent.com/Homebrew/install/HEAD/install.sh)". Follow the prompts. Homebrew is the standard package manager for macOS development tools. - 2Install Java via Homebrew
Run
brew install openjdkin Terminal. After install, runsudo ln -sfn /opt/homebrew/opt/openjdk/libexec/openjdk.jdk /Library/Java/JavaVirtualMachines/openjdk.jdkto create the required system symlink for Java wrappers. - 3Install Graphviz via Homebrew
Run
brew install graphviz. Confirm it installed correctly by runningdot -versionin Terminal. You should see the Graphviz version number printed without errors. - 4Set Render Mode to Local in VS Code
Open VS Code Settings, search for plantuml.render, and select Local. Restart VS Code. Open any
.pumlfile and pressOption+Dto confirm local rendering is working correctly.
/opt/homebrew rather than /usr/local. If VS Code cannot find Java, add "plantuml.java": "/opt/homebrew/opt/openjdk/bin/java" to your VS Code settings.json to point to the correct path.For a detailed walkthrough of the Mac Homebrew setup, this step-by-step community guide on DEV.to covers common Java path issues and Graphviz version conflicts specific to Apple Silicon.
Running PlantUML Editor Without Java: Offline and Docker Options
If installing Java is not an option — due to corporate policy, locked-down machines, or personal preference — you have two viable paths. The first is server mode pointing to a self-hosted PlantUML server running in Docker. The second is using our browser-based PlantUML generator online, which eliminates the Java dependency entirely.
To self-host a local PlantUML server with Docker, run: docker run -d -p 8080:8080 plantuml/plantuml-server:jetty. This starts a local server on port 8080. In VS Code Settings, set plantuml.render to PlantUMLServer and plantuml.server to http://localhost:8080. You now have full offline rendering without installing Java directly.
For teams that just need to share or preview PlantUML diagrams without any IDE setup, our free online PlantUML diagram generator at aitoolsynergy.com supports all seven major diagram types and works in any browser with zero configuration. It is a practical complement to a full IDE workflow.
No matter which approach you choose, the PlantUML syntax you write is identical. Diagrams created in VS Code, in the Docker server, or in our free online tool use the same @startuml / @enduml structure — so you can switch environments at any time without rewriting any code.
PlantUML Editor VSCode — Frequently Asked Questions
The best plantuml editor vscode extension is jebbs.plantuml, available on the VS Code Marketplace. It has over 15 million installs, supports all major UML diagram types, offers live split-panel preview, and exports to PNG, SVG, and PDF. Search “PlantUML” in the Extensions panel and install the result by publisher jebbs.
No — Java is only required for local rendering mode. If you set the render mode to PlantUMLServer in VS Code Settings and point it to the official plantuml.com server, diagrams render through the cloud with no Java installation needed. Local mode is faster and works offline but requires Java JDK and Graphviz.
Open VS Code Settings (Ctrl+,), search for plantuml, set plantuml.render to PlantUMLServer, and set plantuml.server to https://www.plantuml.com/plantuml. Save your settings. The next time you press Alt+D, the extension will send your diagram to the online server and return the rendered image.
The .puml extension marks a file as a PlantUML diagram source file. VS Code uses it to activate the PlantUML extension features — syntax highlighting, autocomplete, and live preview. Other accepted extensions include .pu, .wsd, .iuml, and .plantuml. Most teams standardise on .puml for consistency.
Open a .puml file and press Alt+D (Windows/Linux) or Option+D (Mac). A preview panel opens in a split view beside your code. Alternatively, right-click in the file and choose Preview Current Diagram. You can also enable plantuml.autoUpdatePreview in Settings for the diagram to refresh automatically as you type.
Open the command palette with Ctrl+Shift+P, type PlantUML: Export Current Diagram, and select your format (PNG, SVG, or PDF). The exported file is saved to the out folder beside your .puml file. Use Export Workspace Diagrams to export all diagrams in your project at once.
Yes — switch to local rendering mode by setting plantuml.render to Local in VS Code Settings. You need Java JDK and Graphviz installed. On Mac, both install easily via Homebrew. On Windows, download Java from java.com and Graphviz from graphviz.org, then add both to your system PATH.
Yes — jebbs.plantuml is completely free and open source. There is no paid tier, no usage limit, and no subscription required. The PlantUML rendering engine it connects to is also free and open source under the GPL license. Our online PlantUML generator is also 100% free with no account required.
Graphviz is an open-source graph visualization library that PlantUML uses as its default layout engine for local rendering. It calculates where to position boxes, arrows, and labels in the rendered diagram. Without Graphviz, local mode cannot function. Server mode bypasses this requirement because Graphviz runs on the remote PlantUML server instead of your local machine.
Related Articles








5 Responses
[…] VS Code users switching from PlantUML, our plantuml editor vscode setup guide covers the full extension configuration including server mode, Graphviz, and Mac-specific steps — […]
[…] Setting up PlantUML in VS Code? Our PlantUML editor VSCode setup guide covers the full extension install, server mode configuration, and Mac-specific steps so you can […]
[…] Developer Tools PlantUML Editor VSCode: Complete Setup Guide (Free) Developer Tools PlantUML vs Mermaid: Which Is Best for Your Team? Developer Tools PlantUML Cheat Sheet: Complete Syntax Reference for All Diagram Types Developer Tools PlantUML Component Diagram: Free Guide with C4 Examples JJoshua […]
[…] Tools PlantUML Cheat Sheet: Complete Syntax Reference for All Diagram Types Developer Tools PlantUML Editor VSCode: Complete Setup Guide (Free) Developer Tools PlantUML vs Mermaid: Which Is Best for Your Team? Developer Tools Free PlantUML […]
[…] our PlantUML editor VSCode guide for export configuration, and our PlantUML cheat sheet for the full CLI flag […]